PFDs & Safety
The best kayak paddle floats
A paddle float turns your paddle into an outrigger so you can climb back into a boat you fell out of. It only works if you have practiced, which is the part nobody sells you.
Disclosure: we earn a commission if you buy through the links on this page, at no extra cost to you. It does not change which products we pick or how we rank them. How this site is funded.
The short answer
Quick picks
Ranked for the person outfitting a used boat: what it costs, what it does, and who should skip it. 3 picks.
| # | Product | Best for | Our score | Price |
|---|---|---|---|---|
| 1 |  NRS Foam Paddle FloatClosed-cell foam in a 400D shell. Nothing to inflate, nothing to puncture, and it works the second you slide it on. NRS Foam Paddle FloatClosed-cell foam in a 400D shell. Nothing to inflate, nothing to puncture, and it works the second you slide it on. | Cold hands and no time | 8.3 | $49.95View on Amazon |
| 2 |  NRS Sea Kayak Rescue Paddle FloatTwo air chambers, 8 liters of displacement each and two valves. The inflatable standard for self-rescue practice. NRS Sea Kayak Rescue Paddle FloatTwo air chambers, 8 liters of displacement each and two valves. The inflatable standard for self-rescue practice. | The float you can actually re-enter on | 7.1 | $69.95View on Amazon |
| 3 |  Level Six Inflatable Paddle FloatDual floats and reflective piping with a two-year warranty, at less than the sea-kayak standard. Level Six Inflatable Paddle FloatDual floats and reflective piping with a two-year warranty, at less than the sea-kayak standard. | A cheaper dual-chamber inflatable | 7.0 | $64.95View on Amazon |
What a paddle float actually does
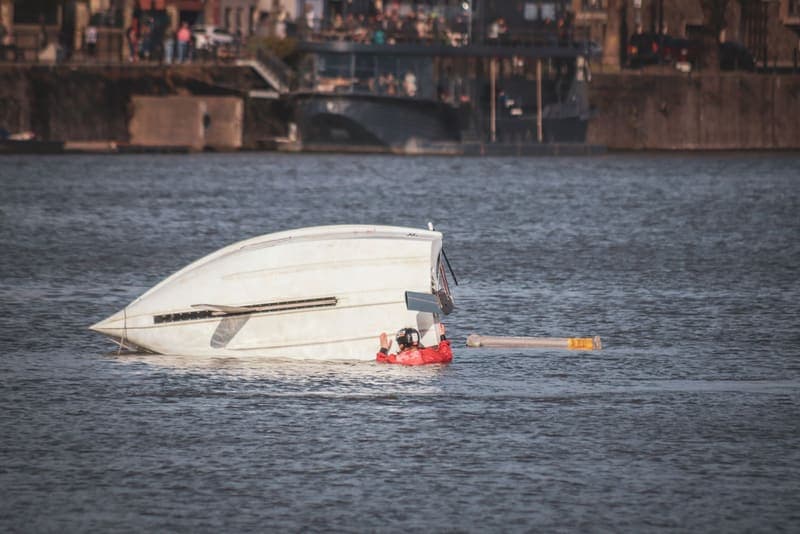
You are in the water beside an upturned kayak. You right the boat, slide the float onto one blade, and wedge the shaft behind the cockpit so the paddle sticks out sideways like an outrigger. The float stops that side sinking while you haul yourself back over the stern and into the seat.
That is the whole device. It is not flotation for you — your life jacket does that job, and the ones we rank are on the budget life jacket roundup. It is a temporary outrigger that makes a solo re-entry possible.
It also does nothing on its own. A float in a hatch that you have never used in the water is a talisman. The version of this purchase that actually works is a float plus one afternoon of practice somewhere shallow and warm.
How we ranked these
Four criteria, weighted equally and published on how we pick:
- Flotation. What the maker publishes about support. Only one float here publishes a number at all.
- Deployment. How long it takes with cold hands, in water, after the thing you did not plan for.
- Durability. Whether it survives living on a deck, and what happens when it is punctured.
- Value.
Foam or inflatable: the real trade
This is the decision, and it is not close for most of the people this site is written for.
Inflatable floats pack flat, and when fully inflated they support more. NRS publishes dual air chambers with two twist valves and 8 liters of displacement per chamber for its sea kayak float — the only published support figure in this whole category. The cost is that you inflate it in the water, after a capsize, with hands that have been in cold water for a minute.
Foam floats work the instant you slide them on. NRS publishes a 400D nylon shell over EPE closed-cell foam at 18 by 8.8 by 3 inches, with a pocket for the blade. Nothing to inflate, nothing to puncture, nothing to fumble. The cost is bulk: it takes deck or hatch space permanently.
If you are buying one float and you paddle cold water alone, buy foam. The most common failure in this category is not insufficient displacement; it is a float that never got inflated.
The number nobody else publishes
NRS states 8 liters of displacement per chamber on its inflatable. Eight liters of water weighs about 8 kilograms, so two chambers is roughly 35 pounds of support at full inflation.
Neither the NRS foam float nor the Level Six inflatable publishes a displacement figure, and no competitor we looked at does either. So the comparison you can actually make between these three is on chambers, material and dimensions — not on how much each one holds up, which is the number you would most want.
We are not going to estimate it for them. Where a figure is not published, this site says so.
The re-entry, step by step
Reading this is not practice, but it is worth knowing the sequence before you try it, because the order is what makes it work.
- Stay with the boat. Everything else follows from this. A kayak blows downwind faster than you can swim.
- Right the hull. Reach across, get a hand on the far edge, and roll it upright. Keep hold of the paddle throughout, or park it under a deck line.
- Fit the float. Slide it onto one blade and secure it — NRS publishes a webbing buckle security loop on its inflatable for exactly this. Inflate it now if it is an inflatable.
- Set the shaft. Lay the paddle across the boat behind the cockpit, float end out, shaft under a deck line or held against the coaming. That is your outrigger.
- Kick and slide, do not climb. Face the boat, get your chest onto the rear deck with your weight toward the float side, then swing one leg over.
- Rotate into the seat, keeping weight low and on the float side. Sit last, and only once you are stable.
- Pump out, then stow the float. In that order.
The pump is the part people forget. A boat you have just climbed into may have a lot of water in it, and a swamped kayak is unstable — which is what the bilge pump guide is about.
Two chambers, not one
On any inflatable float, dual chambers are the spec that matters. A single-chamber float that punctures is a wet bag; a dual-chamber float with one chamber gone is a float with half its support, which is enough to finish the re-entry.
Both inflatables here publish dual chambers. On a float you may be trusting once in five years, that redundancy is the entire argument for buying a known brand rather than the cheapest option on a marketplace.
Cold water changes the timeline
Everything on this page assumes you have time to work through a sequence. In cold water you have less of it than you think.
Cold shock is immediate and it costs you breath control; useful hand strength fades after that. A technique that takes two unhurried minutes in July is a different proposition in 50-degree water, which is the strongest argument for the foam float over the inflatable and for having practiced the sequence before you need it.
It is also the argument for dressing for the water rather than the air, and for not paddling alone in cold conditions in the first place.
Where it lives on the boat
Under the rear deck bungees, within reach from the water, on the side you will re-enter from.
A float inside a sealed hatch is useless: you cannot open a hatch while treading water beside an upturned boat without risking flooding it. If your rear bungees are the original perished cord, that is a five-dollar fix and it is on the deck rigging guide.
The float is also only half the sequence. You will be sitting in a boat with water in it, and getting that water out is the other half — which is what the bilge pump guide is about. Float, then pump, then paddle. That order is why both live on the same deck.
The stirrup, and other things sold alongside
A paddle float is often sold next to a rescue stirrup — a webbing loop that hangs off the boat and gives you a step. It is genuinely useful if you cannot haul yourself onto a rear deck from the water, and irrelevant if you can.
The honest order of purchase is: float first, practice, then decide whether you need a stirrup. Plenty of people find that the float alone is enough on their boat, and a stirrup is one more thing to deploy and stow while you are cold.
What is not optional alongside either is a pump, and on a sit-in, some way of keeping water out of the hull in the first place.
Practice, honestly
A paddle float re-entry is awkward the first time and fine the fifth time. The skills are: right the boat, get the float on the blade, lock the shaft behind the coaming or under a deck line, and keep your weight on the float side as you slide in.
Do it in water you can stand up in, in summer, with someone watching. Twenty minutes is enough to learn whether your boat is even re-enterable solo — some wide sit-on-tops are trivial, some narrow sit-ins with no bulkhead are genuinely hard.
If it turns out your boat is hard to re-enter, that is worth knowing on a warm afternoon rather than in October. The rest of the kit that makes a self-rescue realistic is listed on the used kayak rescue kit.
Does your boat even need one?
Boats differ enormously here, and it is worth finding out where yours sits before buying anything.
Wide fishing sit-on-tops are often re-enterable unaided. There is no cockpit to drain and the deck is wide and stable, so a reasonably fit paddler can haul themselves back on in flat water.
Recreational sit-ins with a large cockpit and no bulkhead are the hardest case. They take on a lot of water, and a swamped boat is barely stable enough to climb into even with a float. On those boats, float bags or a sea sock do more for your odds than any rescue accessory — which boats need them, and how many bags it actually takes, is on the kayak float bag roundup.
Sea kayaks with bulkheads are what the paddle float technique was designed around: small cockpit, sealed compartments fore and aft, and a hull that stays high after a capsize.
Test your own boat in shallow water on a warm day. Whether you can re-enter it unaided is the single most useful thing you can learn about the kayak you own, and it costs nothing to find out.
Inspect it like a safety device
A paddle float lives on a deck in the sun and is used approximately never, which is the ideal recipe for a device that fails when needed.
On an inflatable, inflate both chambers at home once a season and leave it overnight. A chamber that is soft in the morning is a chamber that will be soft in the water. Check the valves, which are the usual failure point, and check the webbing and buckle.
On a foam float, check the shell for UV damage and the blade pocket for tearing. NRS publishes a 400D nylon shell, which is durable, but nothing survives five years of unshaded sun without changing.
The same seasonal check applies to everything else in the rescue kit, which is listed on the used kayak rescue kit.
When you do not need one
Three honest cases:
You always paddle with other people. An assisted rescue is faster and easier than any solo technique, and a second boat is worth more than any device.
You paddle water you can stand up in. On a shallow lake or a small river, the rescue is standing up.
You have a wide sit-on-top and have re-entered it unaided. Plenty of fishing kayaks can be climbed back onto without any aid. Test that claim once, then decide.
What we would buy
For most people, the NRS foam float. It works instantly, it cannot deflate, it publishes its dimensions, and it is the one that still functions when you are cold and rushed.
For sea kayaking and long crossings, the NRS inflatable. Dual chambers, published 8 liters per chamber, and it packs flat on a deck that is already full.
If you want dual chambers for less, the Level Six — accepting that it publishes no displacement, no dimensions and no fabric weight.
And whichever you buy, use it once this summer, in shallow water, before it becomes the thing you own but have never tried.
In full
Every pick, in detail
Specs below are the manufacturer's published figures, cited per product. Where a maker does not publish a number, the row says so rather than guessing at it.
#1 · Cold hands and no time
NRS Foam Paddle Float
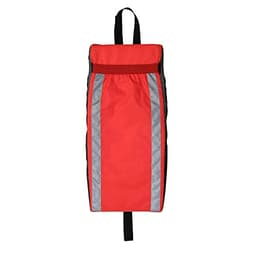
Closed-cell foam in a 400D shell. Nothing to inflate, nothing to puncture, and it works the second you slide it on.
Published specs
| Shell | 400D nylon |
|---|---|
| Core | EPE closed-cell foam |
| Blade pocket | Nylon fabric pocket for the paddle blade |
| Size | 18" L × 8.8" W × 3" D |
| Visibility | Reflective tape |
| Displacement | Manufacturer does not publish this |
Our score, broken out
- Flotation7.0
- Deployment9.5
- Durability9.0
- Value7.5
What it gets right
- No inflation step. In the water, after a capsize, that is the difference between a device that works and one you fumble.
- Closed-cell foam cannot deflate, so it is the float to own if it lives lashed to a deck in the sun all season.
- Published dimensions, so you can check it against the deck space you actually have.
What it gets wrong
- NRS publishes no displacement figure for it, so you cannot compare its support to the inflatable's published 8 liters per chamber.
- Foam is bulky. It takes deck or hatch space permanently, where an inflatable packs flat.
- Less support than a fully inflated dual-chamber float, which is the trade for instant deployment.
Who should skip it
Skip it if deck space is the constraint. This is the bulky option, and that is the price of not inflating anything.
#2 · The float you can actually re-enter on
NRS Sea Kayak Rescue Paddle Float
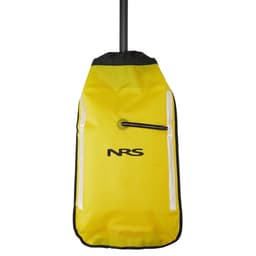
Two air chambers, 8 liters of displacement each and two valves. The inflatable standard for self-rescue practice.
Published specs
| Chambers | Dual air chambers, two twist valves |
|---|---|
| Displacement | 8 liters per chamber |
| Security | Webbing with buckle security loop |
| Visibility | Reflective safety tape |
Our score, broken out
- Flotation9.0
- Deployment6.0
- Durability7.0
- Value6.5
What it gets right
- Two chambers is the point: a puncture in one leaves you with half a float rather than a wet bag, and that is the failure this device exists to survive.
- 8 liters per chamber is published — this is the only float here that tells you how much support it actually provides.
- The buckle loop holds it on the blade under load, which is when a float that slides off stops being a rescue device.
What it gets wrong
- It has to be inflated, and you are inflating it in the water after a capsize, with cold hands.
- The most expensive float here, for the least convenient deployment.
- Inflatables puncture. Practicing re-entry on gravel or an oyster bar will eventually cost you a chamber.
Who should skip it
Skip it if it will live in a hatch unpracticed. A float you have never used in the water is a talisman, not a plan.
#3 · A cheaper dual-chamber inflatable
Level Six Inflatable Paddle Float
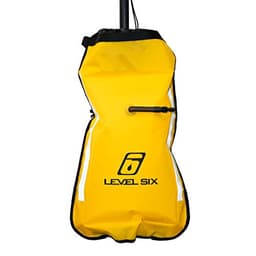
Dual floats and reflective piping with a two-year warranty, at less than the sea-kayak standard.
Published specs
| Chambers | Dual floats |
|---|---|
| Visibility | High-visibility reflective piping |
| Material | Synthetic |
| Warranty | Limited 2 year |
| Displacement | Manufacturer does not publish this |
Our score, broken out
- Flotation7.5
- Deployment6.0
- Durability7.0
- Value7.5
What it gets right
- Dual chambers at a lower price than the category standard, which is the spec that matters most on an inflatable float.
- A published two-year warranty, which is more than most paddling accessories carry.
- Reflective piping around the whole float rather than a single strip of tape.
What it gets wrong
- Level Six publishes no displacement, no dimensions and no fabric weight, so there is very little to compare.
- Same inflation problem as every inflatable: you blow it up when you are already in the water.
- Stock is thin and it is the least widely carried of the three.
Who should skip it
Skip it if you want published numbers behind the purchase. The NRS inflatable tells you what it displaces; this one does not.
FAQ
Questions people actually ask
What is a kayak paddle float for?
Getting back into a kayak you have fallen out of, alone. The float slides onto one paddle blade and the shaft wedges behind the cockpit, turning the paddle into a temporary outrigger that stops the boat rolling while you climb back in.
It is not flotation for you — that is your life jacket's job — and it does not work without practice. Twenty minutes in shallow water is the difference between owning one and being able to use one.
Is a foam or inflatable paddle float better?
Foam for most paddlers. It works the moment you slide it on, it cannot deflate, and it is the one that still functions when your hands are cold and you are rushed. NRS publishes 400D nylon over closed-cell foam at 18 x 8.8 x 3 inches.
Inflatables pack flat and support more when fully inflated — NRS publishes 8 liters per chamber across two chambers — but you inflate them in the water after a capsize, which is exactly when fumbling is likely.
How much flotation does a paddle float provide?
Almost nobody publishes it. NRS states 8 liters of displacement per chamber on its sea kayak inflatable, which is roughly 35 pounds of support at full inflation across two chambers.
Neither of the other floats we rank publishes a displacement figure, so you cannot compare them on support. Where a maker does not publish a number, we say so rather than estimating it.
Where should a paddle float be stored on a kayak?
Under the rear deck bungees, on the side you would climb back in from, within reach from the water.
Inside a sealed hatch it is useless — you cannot safely open a hatch while treading water beside an upturned boat. If your deck bungees are the original perished cord, replace them first; it is the cheapest fix on the boat.
We have not paddled with any of this gear. Everything above comes from published specifications, cited manuals and live retailer prices. Here is exactly how we pick.
Sources
Read next
Related on Drift & Dime
PFDs & Safety
The kayak safety kit checklistThe required items, the genuinely useful ones, and the padding to skip.
Kits
The used kayak rescue kitFor a neglected hull: what perished, what is missing, what to check first.
Outfitting
The kayak bilge pump guideFlow rates compared, and why stowage decides whether a pump is any use.
PFDs & Safety
The best budget kayak life jacketsSix approved vests ranked on fit, mesh back panels and published buoyancy figures.